
“YOU THINK THIS JOB IS EASY? Teaching kids is EASY. THIS JOB STINKS.”
The Handy Maniac is shouting into my iPhone at my sister who lives in Los Angeles. They are on FaceTime so she can show him her handiwork and he can troubleshoot some snags she’s hit in the home repair project she has taken on during her spring vacation.
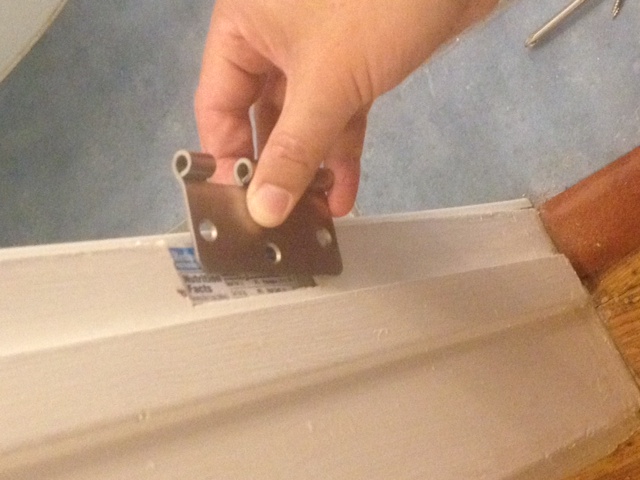
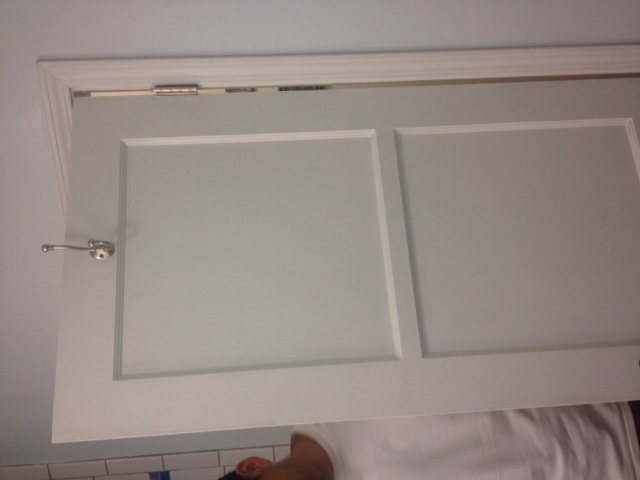
My sister is a high school English teacher. Which may explain her saintly patience in listening to HM’s critique of her door replacement skills. I, on the other hand, am hugely impressed that she has taken her bathroom door off, painted the door and the trim, and replaced the hinges in order to match the nickel-brushed finish of her bathroom fixtures. Are you following me? She has unscrewed the hinges, put new hinges on, and re-hung the door.
The problem is, the door doesn’t shut properly now. So HM received an email wondering whether she should have just bought a new door, rather than try to save the old one, which seemed more solid to her than cheap replacement options.
HM approves of this choice. “You go buy a new door – YOU’D SPEND A MONTH OF SUNDAYS SHAVING THAT NEW DOOR because it would not fit your old door opening,” he shouts. (I point out that just because she is in California, doesn’t mean he needs to shout into the phone. Also, I suspect her view on FaceTime is of his tonsils.)
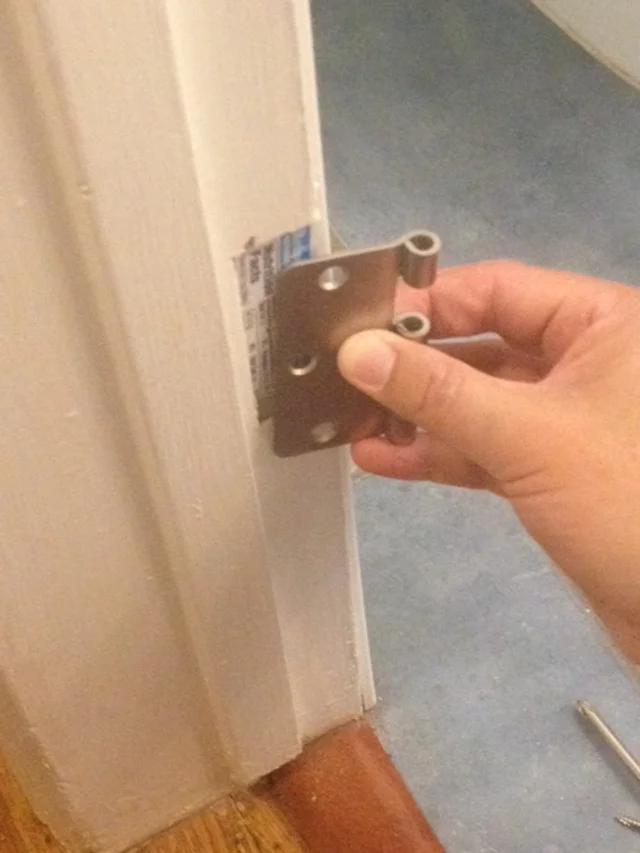
He is unimpressed with my logic and continues his method of long-distance communication: “OPEN THE DOOR. AND CLOSE THE DOOR.” She does this and he notes when the door starts to hit the floor as she closes it. “NOW SHOW ME THE JAMB. NOW SHOW ME THE DOOR SIDE OF THE HINGE.” He takes a dramatic pause....and diagnoses the problem: “YOU NEED TO SHIM.”
Basically, the new hinges are thinner than the old ones, which means they are now set further back, causing the door to hang unevenly. “IT’S A FAMOUS THING,” he declares. (This is one of HM’s favorite phrases. There are many famous things in his line of work. Thin hinges isn’t one I’ve heard before, but that’s why I am writing this blog. To learn about famous things in home repair and renovation.)
HM launches into an imitation of my sister, imagining what she was thinking when she was screwing in the new hinge. “Hmm. I’m screwing these nice beautiful screws in these holes, and they are going in deeper….I wonder if I should do anything about that??”
This is the moment where I would roll my eyes or tell him to stop using that voice to imitate me. But my sister just listens patiently. Maybe it's not being a teacher, maybe it's being mother to a 5- and 3 -year-old.
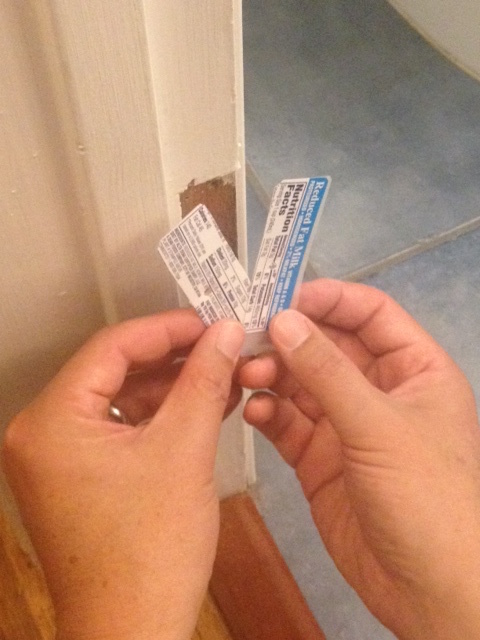
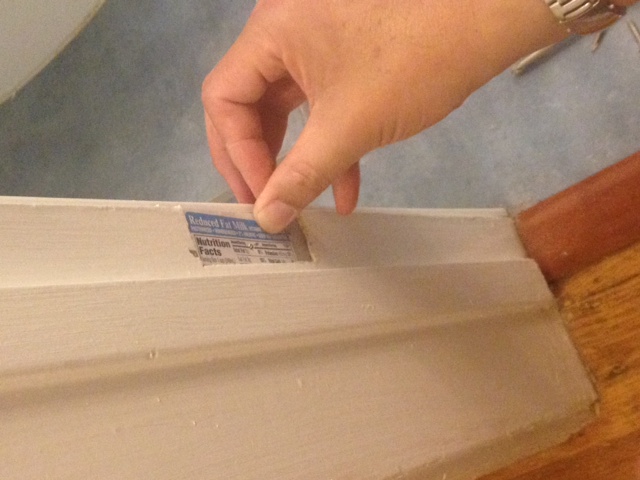
He instructs her to take the box that the new hinges came in and use a razor knife to cut a piece that matches the shape of the hinge to use as shim to build up the thickness. “The hinges came in a baggie,” she informs him. HM is not pleased with this new packaging. Apparently “back in the day” hinges came in boxes that could be used as shims, it was part of the WHOLE SHEBANG.
But he has a solution. “You need something that’s one-to-two millimeters thick. Do you have a milk carton or juice box?” As I mentioned, she has two children, so he knows the answer to this, but I can tell he is proud of himself for suggesting these alternatives. HM has spent a lot of time in homes with babies and toddlers and he likes to show-off this kind of work-with-what-you-have solution.
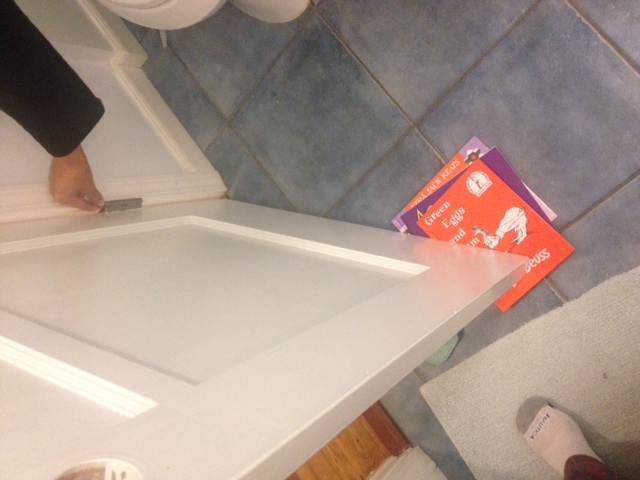
He also instructs her to find something to use as a wedge to prop up the door while she removes the hinges again, to prevent it from sagging. He suggests sliding a paperback book or two (Harold and the Purple Crayon is probably the right width) under the door. “Just keep shimming the heck out of the jamb-side hinge until you get the hinge to be the old thickness, so that the hinges are flush with the door and jamb again.”
He quizzes her on what kind of drill she has. “We have a corded drill.”
“Very good!”
“You gave it to us.”
“And you know why? Because if you had a cordless, it would be dead right now. Because you wouldn’t have charged it!”
I tell him she knows this because she read the column about tools.
He ignores me. Again.
“Why do we need a drill for this?” she counters? “I just use my 4-in-1 screwdriver. Right tight-y, left-y loose-y.”
HM pauses. I can tell his is impressed. Because he is speechless for about 2 seconds.
“Touché baby. Touché” he says.
Later, my sister sends photos and I am once again impressed with how she and her husband (who did the shimming) followed HM’s instructions to the letter and fixed their door. They are HM’s dream clients. No back talk. They JUST DID WHAT HE TOLD THEM. “I bet they really started to understand what I was talking about when they did it,” he says proudly. In fact, my brother-in-law does text “You actually know what you’re talking about!” Along with photos of their overstuffed closet and a suggestion that HM tackle this topic next.


HM does admit later that if it were HIM, he would re-fill the screw holes before re-attaching the hinges.
“Blown out screw holes are one of the biggest problems with doors. You have to get the hole filled again. So you have a new substance for the screw to bite into.”
So I thought we should share that information.
How to Plug a Hole
Gather whatever wood you can use to fill the old screw holes. This can be wooden matchsticks, toothpicks, dowels, popsicle sticks, or wood shavings. Shove the wooden pieces as deep as you can in the hole, saturated in yellow carpenters glue, and break the pieces off to be flush to the mortice (the recessed area on either the door or jamb that the leaf of a hinge fits into). Then let it dry for at least an hour.
Another method is to drill the hinge holes out completely with a drill bit and fill the hole with the same-sized round wood dowels (e.g. use a hammer to tap a ¼ “ dowel into a hole you have drilled out with a ¼” drill bit). This creates a new solid block of wood to drill into. HM calls this "BOYSCOUTING IT."
Other Door Issues
In the course of writing this column, a few other readers asked about door problems: closet and interior doors that are hard to open and close. Some of these problems can be solved with shimming, but others may require other solutions. I ask HM about how to diagnose a door problem and find the right solution.
“A rubbing door might have to be shaved,” he admits. I have seen HM shave a door. There is often cursing involved. “What can we do before we resort to shaving to adjust the door?” he asks.
That’s what I want to know, I tell him.
“Maybe you should put that earlier in the column,” he says.
“How about you just tell me and I’ll figure out where to put it,” I reply.
“Really? This is how it’s going to be?” he asks, getting a little testy.
“Really,” I say.
He tells me to stop typing and just listen to him so that I understand.
I look up and smile. And continue to type as he talks, because otherwise I know I will forget his instructions.
“You can’t type without looking,” he says.
“Yes I can.”
He is impressed. Apparently I have a few skills up my sleeve that he didn’t know about.
We return to the door diagnosis. “I first try to push the door (or doors, if it’s a closet or French doors) closed as best I can – all the way. It becomes evident where the door is rubbing – on the hinge side or knob/latch side.”
“If there’s space on the hinge side (between the edge of the door and the jamb) – wouldn’t it be nice to move the hinge in some more?”
I agree, that would be nice.
“That involves removing the leaf of the hinge that is on the jamb side.” If you are lucky, there are shims you can remove to make the hinge flush.
He jumps up and runs to the basement and returns with a hinge and two pieces of wood, to give me a visual demonstration for his explanation. “Each half of a hinge is called a LEAF. A PIN is what holds them together.”
I nod. Got it.
“I prop the door open – like your sister did with those books. I take the screws out of the jamb leaf. And chisel away at the wood so I can move the hinge in a bit.”
I pause at the word “chisel.”
He knows what I’m thinking. “Chiseling is an art form. Maybe we should do a side bar on chiseling.”
I am impressed with his use of the term “side bar.” I agree that we should do a separate post on chiseling.
I suggest we get back to the simpler solutions.
“What if the whole door is rubbing on the bottom and I have a gap at the top of the door? Wouldn’t it be nice to move the whole door up, just as it is?”
Once again, I agree that would be nice.
To move the door up:
- Leave the leaf on the door and unscrew the leaf from the jamb side.
- Lift the door up the quarter or eighth of an inch that you want to move it up.
- Mark this new spot on the jamb side.
- Fill the old holes (per the instructions above)
- Chisel out the 1/8th or ¼” of wood up to your new mark.
- Re-drill new holes and attach the leaf to the jamb in the new, higher location.
To review:
- In a perfect world, the hinge should be flush with the door and the jamb.
- First see if you can simply tighten the hinges.
- If the screw holes are blown out, remove the leaf from the loose side, fill the holes and screw the hinge back in.
- If the hinge is sitting too deep (either because you have bought a new, thinner hinge, or maybe because you chiseled too deep a hole for the hinge, or perhaps the door has shrunk with the weather), you can use a shim to pad it out and get it flush.
- If the hinge is protruding (either because of too many layers of paint, because the door has expanded in the heat, or you have bought a replacement hinge that is bigger than your original hardware), you will need to chisel out the mortice in paper-thin increments.
The chiseling side-bar is The Handy Maniac’s version of a cliff hanger. Stay tuned.